I am a newbie with mobile application development. As I start fiddling around, I find it is not exactly straightforward to setup an Android development environment for the first time. This post tries to take you through the few steps required before you can run a very first Android application.
Installing Eclipse
First you want to install the Eclipse IDE. Eclipse is an Integrated Development Environment very much focused on Java development. Many plugins exist to extend its functionality. Some of which will make your life as an Android app developer much easier.
Point your browser to the Eclipse website eclipse.org and go to their download page.
Many options there. I picked the Eclipse Classic package as I don’t yet need specific plugins from the other package. If I understand correctly, the plugins can be installed later on anyway so you can choose any of the options. Once downloaded, simply extract the archive content to your working directory of choice.
The package is quite big so it might take a while. In the meantime, you can already check out the Android Developer website. It contains a lot of useful information about developing and designing mobile application.
Android SDK
The next piece of software you need is the Android SDK. You can find the download page here. Download and start the installation. The Android SDK setup will take care of installing the Java SE Development Kit if it is not installed already. Choose where to install the SDK and continue the installation.
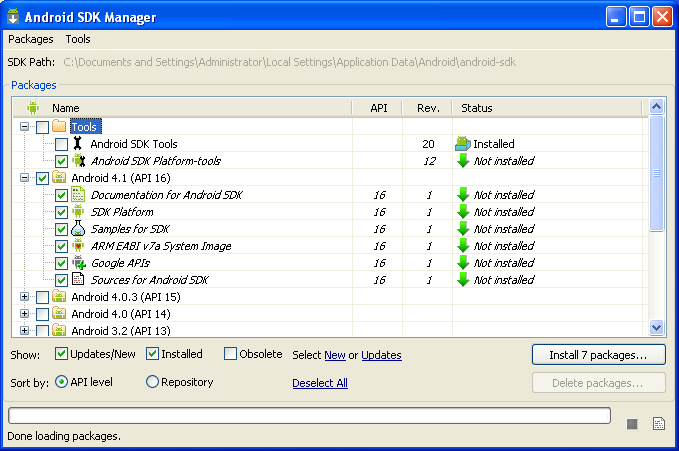
You are not done yet with the Android SDK installation. You still need to run the SDK manager to get the system images for the versions of Android you want to target. This is what it looks like:
The screen show the versions of Android that you can target for your applications. Each version shown exposes a different level of functionality of the Android framework and devices. We will use the latest version here. For more information on how the API is versioned, you should have a look here on the Android developer site : What is an API level ?
The ADT Plugin
We are almost there. The last step is to install the eclipse plugin to support Android development. This plugin will integrate the Android SDK components into Eclipse so that development is as straightforward as possible. The plugin is called Android Development Tools (ADT for short). You can find more information about it here.
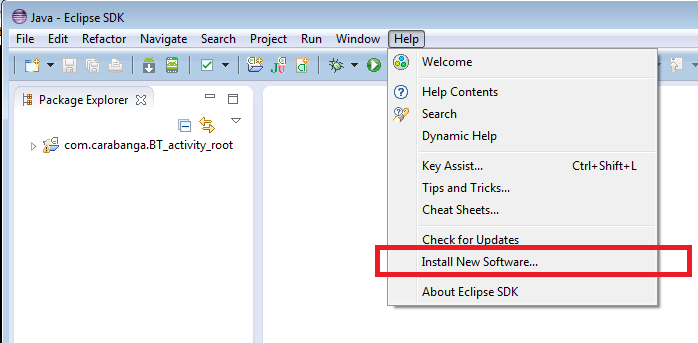
The installation is done directly within Eclipse so go ahead and start it. Go to menu Help -> Install New Software
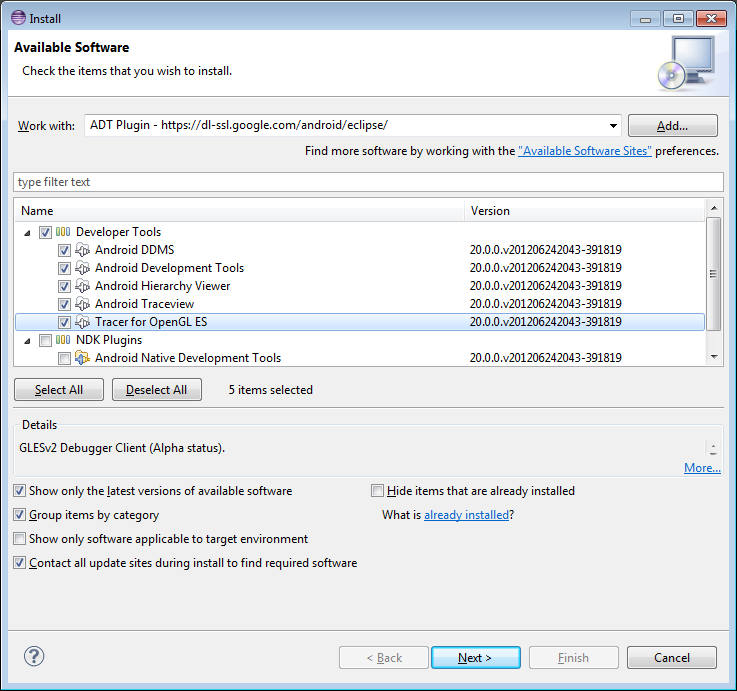
Add a new repository called ADT Plugin with the URL https://dl-ssl.google.com/android/eclipse/. Some time after selecting the repository, you should get a list of software similar to this. Select the whole Developer Tools branch and continue with the wizard by clicking Next.
And voilà ! ![]() You can now create new Android projects and code away for your favorite device.
You can now create new Android projects and code away for your favorite device.
Conclusion
In order to develop Android applications, you need to get:


